

Since our Boces SLS director (hi Molly!) purchased a “green screen in a backpack” kit this year I thought this would be a fun topic to try out.
The first takeaway I gathered from the readings was that this whole green screen thing isn’t nearly as complicated and technical as I thought it would be-or maybe I should say, it doesn’t have to be super complicated and technical. Either way, it was a great realization!
Another great realization? The WeVideo account I have through my school district supports the green screen features mentioned in the readings! When I logged in to check if I had the green screen features, I noticed that my account is set to expire in August. With that in mind, I decided that in addition to trying to make a quick green screen video with WeVideo I should also try out DoInk, just in case the district doesn’t renew my WeVideo account.
Some things I learned during my quick experiments:
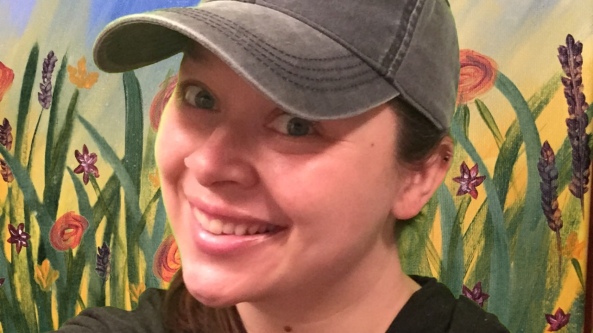
- Lighting is waaayyyy more important than I realized. One of the videos I watched while exploring this tool was about the common mistakes made making green screen videos and how to avoid and/or fix them. Most of the issues (and their fixes) were a bit beyond my current level of green screen experience but, one thing I did take away from the video was how important lighting can be to your video creation. In fact, my first attempt went much the same way as one of the video examples! In my attempt to get rid of shadows on the wall behind me, I caused the green to read as lighter than it was and when I went to remove it in the WeVideo editor, my face and parts of my scarf and hat disappeared too! Which leads me to my next big realization…
- Clothing can be tricky! I knew you can’t wear the same color top as the screen you’re recording against. However, I didn’t realize that similar colors could be a problem or that colors could be made to appear to the same on camera, depending on the lighting used. Going back to my first attempt in WeVideo, the scarf I wore had no green it at all. It was red, yellow and black so I thought it would perfect for my winter background. However, when the bright lighting overpowered my green screen and made it look lighter, it also washed out the yellow and white in my scarf and made them look close enough to the wall color that the editing program removed them as well as the background.
- Finding copyright friendly background images can be a real pain! I’m not sure why this surprised me as much as it did-we’ve all experienced this when helping students try to find images for a project. I made my video first then tried to find a background image to go with it which, in hindsight, was not the best planning. I ended up just turning it into an image instead. I would definitely make sure that part of the planning process for my students (and my future green screen projects) includes locating any wanted background images before recording the green screen video so changes can be made before filming!
- Bigger green screen=better results. None of the green walls in my house ended up working very well as green screen backgrounds and I couldn’t find a green tablecloth at the corner store in town so I had to settle for a piece of posterboard that was the right shade of green. I thought the posterboard would be big enough but in the end, to make it work, I had to just do head and neck shots which takes some of the impact and wow factor out of the green screen videos and pictures.
- Don’t forget to hold your phone sideways! I held my phone vertically and when I transferred my videos into the editing programs I had blank spots on the sides which meant I had to adjust the position of the images in the editing process which was a pain in the you know what and ultimately, still not that convincing to look at because of the hard lines on the sides of my face. I tried to reshoot the videos with my phone horizontal instead but, because my green screen background wasn’t that big, I had to get even closer to my face than before and I lost a lot of the background (saying it again: bigger is better when it comes to green screen fun!).

Ideas, Ideas, Ideas!
Some ideas I’m very excited about exploring with classes include:
- 2nd Grade-Post Thanksgiving, my2nd-gradee teachers have done a reindeer research project for the last several years. After learning about ChatterPixs at the AASL conference in Columbus, we’ve been using that for their final project. I think it could be fun to replace that project with green screen reports on their reindeer. Maybe we could even make it cross-curricular and have the art teacher help them make paper bag reindeer puppets that could “talk” on camera…
- 3rd Grade-Instead of doing poster presentations for their country research projects, it would be cool to have our 3rd graders do “live” reports from their countries. Another idea I have for my 3rd graders is creating news reports on Christmas traditions around the world. Finally, I have a 3rd-grade teacher who would love to do more book reports with her class. Using the planning documents from Princeton Day School’s library, we could turn their book reports into green screen book talks!
- 4th Grade-The Erie Canal is always a big unit for our 4th graders. I like the idea of them creating news reports on the building, and eventual grand opening, of the Erie Canal.
- 5th Grade-Instead of doing a brochure or Google Slide project on the different biomes, our 5th graders could create nature show style videos reports “live” from different biomes.
- 6th Grade-I love the idea of having our 6th graders partner up and do interviews with characters from myths! Finding the right image to represent the setting of their myth could be a challenge but in a great, learn something from it, kind of way!
Some other ideas I’m excited to explore:
- My makerclub kiddos could create their own characters, props, and scripts to create green screen movies.
- I also like the idea of creating little green screen videos of my own to introduce new lessons/units/concepts in creative and interesting ways.
- I’ve been trying to get students more interested in reading and writing book reviews so I like the idea of incentivizing it with the student featured book review posters mentioned in this post!
- Finally, I think to make making green screen videos easier to do, I can envision creating a green screen video makers version of the dress up box! I’m thinking things like scarfs, hats, umbrellas, sunglasses, fake glasses, props etc. Then, we could always have those special extras on hand to create even better, more believable videos!
All in all, this might be the most fun I’ve ever had exploring a Cool Tools topic!I think I’ll try it with my makerclub kiddos first so I can work out some of the kinks before I try it out with classes but overall, I’m very excited to share the fun with my faculty and students!

Thanks for sharing some tips! Green screen is my next thing to tackle because I’ve never used/done anything using one!
What a fabulous post!! Thank you for sharing all those tips and fun ideas. I had the same problem with not having a large enough green screen area. 2 pieces of green paper really limited what I could do!