Cynthia Says….

Did you know that way back in 1999, the U.S. government established that ALL public and private school websites would need to be made web accessible, as in accessible to students with disabilities? If you didn’t, you’re not alone. Research shows that many schools are not in compliance with this directive (see the 1999 Journal of Special Education Technology Vol.24, number 2 for one example).

One quick way you can check your website for compliance is with Cynthia Says. Cynthia Says is fast, easy way to check how accessible your website is for users with disabilities.

From the Cynthia says main page, simply input the address of a website you want to test, and then click “Test your site”. Within seconds you’ll receive a report detailing what areas the site passed, what areas it failed, and in some cases the specific locations of areas that may need work.

For a more detailed explanation on how Cynthia Says works, there’s a video on YouTube you can watch for a demo.

For more information on how to make your website more accessible and what to look for before using a website with students, check out Project Enable’s “Evaluating Accessibility” page.

Bifocals & Buns had some areas that need improvement so I’ll be trying to address those as the site continues to expand and grow. What about you guys? Any plans to work on your site’s accessibility? Were you surprised with your site’s score? Share and share alike in the comments and I’ll see you all tomorrow.

Cheers,

~Serena

It’s Hip to Be Square

A few weeks ago, Mr. Bifocals&Buns and I packed up the dog and headed off to the family cabin for a long weekend. I was flipping through an old magazine one unexpectedly rainy morning and came across a fascinating article about a company/technology called Square.

Square is a way for anyone to turn their smartphone or iPad into a register that will accept credit card payments. Square also always anyone with a Square account to automatically and simply pay for purchases at businesses set up to accept Square account payments. When you sign up for a Square account they’ll even send you the Square card reader free. Square does charge a fee for handling the transaction. You can choose to pay per transaction (2.75%) or a flat monthly rate ($275) depending on what is more economical for your business. For more information on getting and using Square hop on over to their site and have  a look around.

Okay, looks and sounds cool but what does it have to do with libraries right? Well, remember in this post when I confessed some of my dirty little secrets? One of those secrets mentioned was my inability to return library books on time ever. The other part of that confession is that I rarely have cash on me so when I go to the library spur of the moment I often don’t have even the little bit of change necessary to pay off those fines. Now, my librarians are very understanding and nice and will always tell me to worry about it next time. However, I hate having that hang over me and have often wished they would set it up so I could pay my fines online.

Well, what if they set up a Square account? If I have a Square account I could pay my fines just by walking in the library. You don’t have to stop at fines either. You could set it up so people with Square accounts could pay for other library services like copies, printing, hold fees etc. If your library has a coffee shop that could be something people pay for through Square. Square wouldn’t be able to completely replace old fashion money exchanges between librarians and patrons but how 21st century cool does your library look by using Square and making Square available to patrons?

What do you think of libraries using Square? Can you think about other ways to use Square in the library? Anyone have any thoughts on how to use it at a school library? Share away.

Tomorrow we’re discussing another library mashup. Stay tuned for the details.

~Serena

Technology Tuesday-Readability for All

During my Library Services for Students with Disabilities class last week we completed a simulation aimed at simulating the effects of cognitive overload on our students. During the simulation, we were simultaneously attempting to move a stick figure back and forth catching bombs and, searching for information on a website to complete a checklist of tasks. There were two levels to the simulation, easy and hard, and every time you dropped a bomb and failed to complete the tasks you had the option to slow the bombs down. Below is a screen shot of that simulation but I highly encourage all of you to follow this link and try the simulation out yourselves.

The goal of the simulation is to give participants a more thorough understanding of how frustrating it can be for students with an intellectual disability to complete a task. Several of my classmates admitted to giving up on completing the tasks and many of us (myself included) admitted that the only way we were able to complete both the easy and the hard level was to blindly click on the screens, without paying attention to the content, until we found the correct answer. Not a single person in class could provide more information about the website we were exploring in the simulation beyond, “it had something to do with penguins”. We could all see how students with intellectual disabilities could become frustrated with assignments and give up on them because, “I can’t do it and I’m not learning anything anyways.”

After sharing our frustrations and exploring how students with intellectual disabilities may feel when presented with distraction while working we brainstormed strategies that we, as school librarians, might be able to employ to make the library more accessible for our students with intellectual disabilities. One of the ideas was to download and install Readability on library computers.

What’s Readability you ask? Well allow me to fill you in: “Readability is a free reading platform that aims to deliver a great reading experience wherever you are” by turning “virtually any web page into a clean, comfortable reading view” (Readability.com, FAQ, 2012). To use Readability, you simply go to the website and download the Readability add-on.  After downloading the add-on, you can change almost any webpage into a cleaner, easier to read page by clicking the readability add-on button. Here is a before and after example I took from the Today Show website:

The article about Twitter’s new profile page, before using Readability

Now, let’s look at that same page after running it through Readability’s add-on:

The same article, after using Readability

Ahhh, so much better. Using the Readability add-on makes the page cleaner, free of distractions, and allows the content to take center stage. So there you have it: a quick, free way to make websites easier on our students with intellectual disabilities. I’ll admit that I’m tempted to use it with all students just so they have less temptation to follow links and pay attention to things other than the assignment/task at hand.

Do you have any suggestions/strategies to make the library more accessible for students with intellectual disabilities?

See you tomorrow,

~Serena

Technology Tuesday-Schoology

First things first: Apologies for leaving you hanging yesterday. I had to run the dog to the vet (again-she had a procedure done and I’m going every other day to have her bandages changed) and had two other appointments of my own and the day just got away from me.

Now, let’s explore another interesting technology together shall we? I subscribe to the AASL’s tip of the day email (if you don’t already I highly recommend it) and yesterday’s tip was about cultivating back to school collaborations. One of the technologies briefly mentioned in the email was Schoology. Having never heard of Schoology before I instantly hopped online to look it up.

Verdict? Definitely worth sharing with all of you.

As you can see from the overview screenshot, Schoology offers  a few great features such as: managing your lessons, finding intriguing resources, interacting with your students, fellow teachers, and parents, posting assignments, posting tests or quizzes, and hosting discussions. Schoology even allows you to keep track of how students are doing with nifty charts and graphs.

Setting up a Schoology account and your Schoology profile takes mere minutes and afterwards they walk you through a quick introductory tour to get you started.

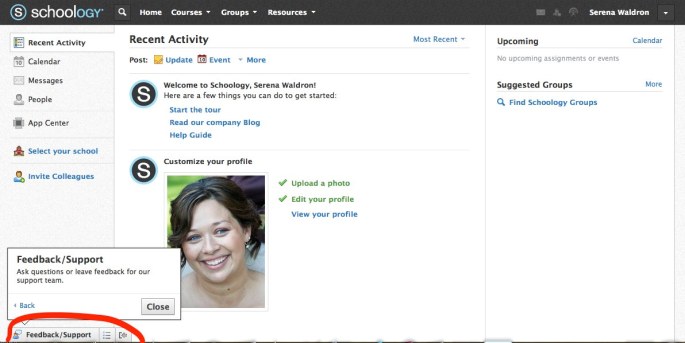
Now let’s use my account to show you how the introductory tour works. When you log into your account, there will be a link to click on to start the tour: 

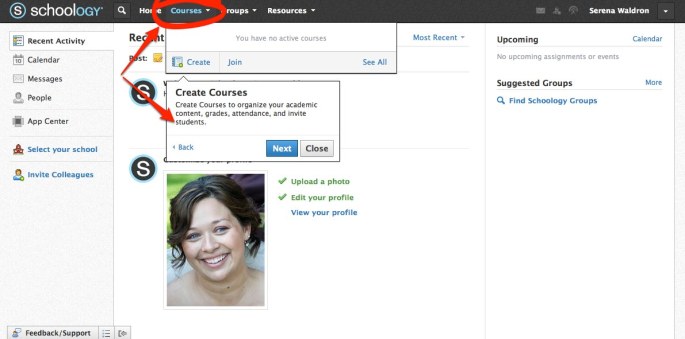
The first leg of the tour shows you where/how to add courses to your account:

The second leg of the tour shows you how to add or join groups in Schoology:

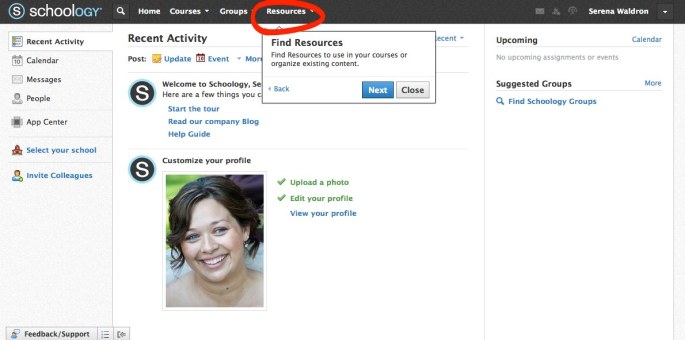
Leg three points out where to go to for additional resources:

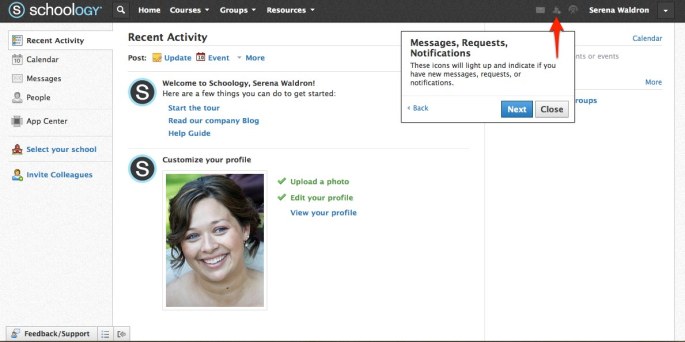
The fourth, fifth and, sixth legs of our tour explain the navigation options in the upper right hand side of the screen:

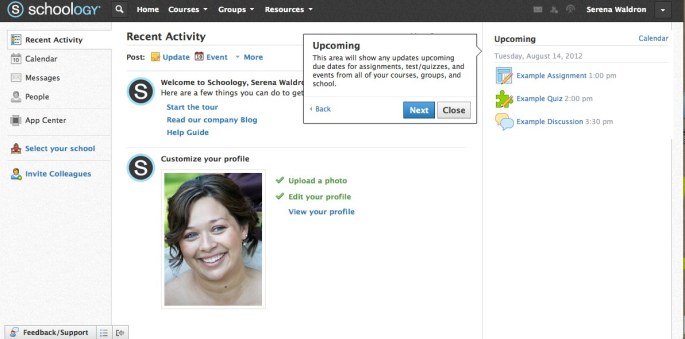
The seventh part of the tour explains your Schoology calendar:

The eighth leg explains the recent activity center a bit further and the final section of the tour shows you where to get further assistance with Schoology:

One of my favorite features I discovered while exploring Schoology is their App Center:

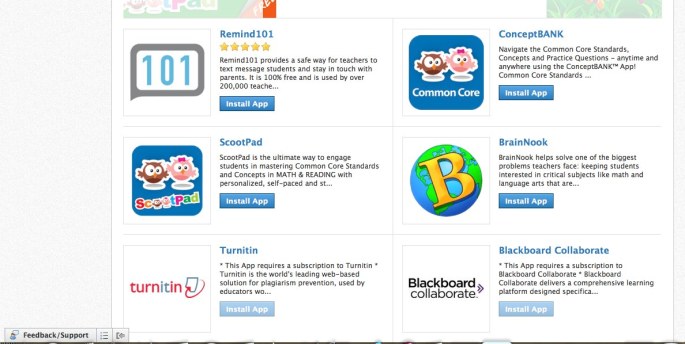
The App Center offers a few cool apps to use with students:

I was especially impressed to see that the Concept Bank and ScootPad Apps utilized the Common Core.

All in all, Schoology seems to have a lot to offer and could be a great addition to your educator toolbox. Check it out and let me know what you think.

Until tomorrow,

~Serena